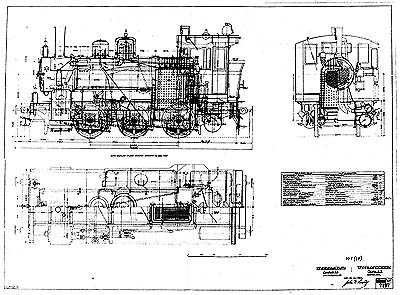
Click HERE to download a HUGE (1.4 x 1.9 meter - approx. 5 x 9 ft) image of this loco! The drawing is in TIFF format, and will be in 1:8 scale if printed (in parts, "tiled") at 100 dpi.
Making patterns for the "Vr1" 0-6-0
Exactly 1 year, to the day, after I steamed up the 3003 for the first time, I started working on the casting patterns for my next project, the 0-6-0 shown on the previous page. Having obtained a small mill and a rotary table, the work started to proceed quickly. I made D-bits with the right radius and taper to get the proper profile for the spokes and the wheel rim. It took about 10 hours to design, draw and mill out the wheel pattern.
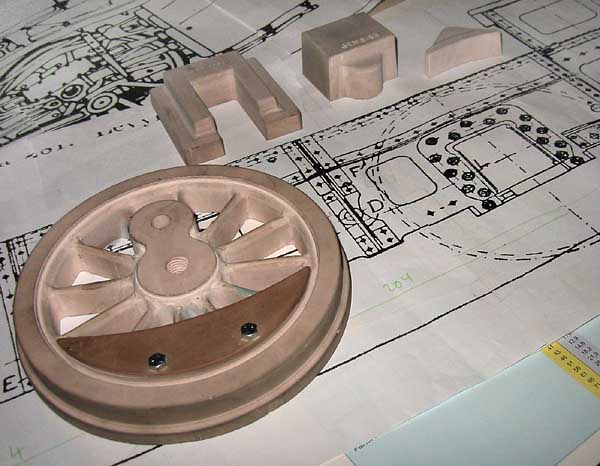
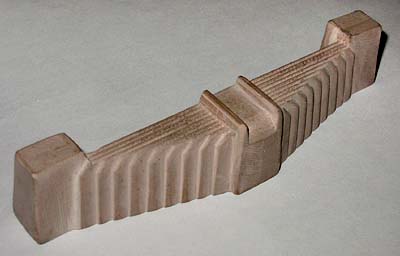
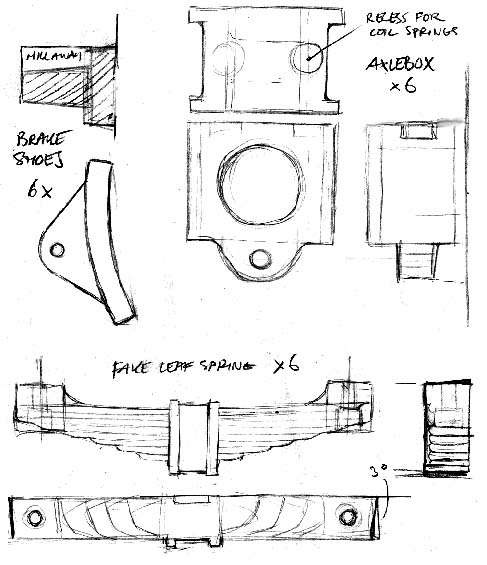
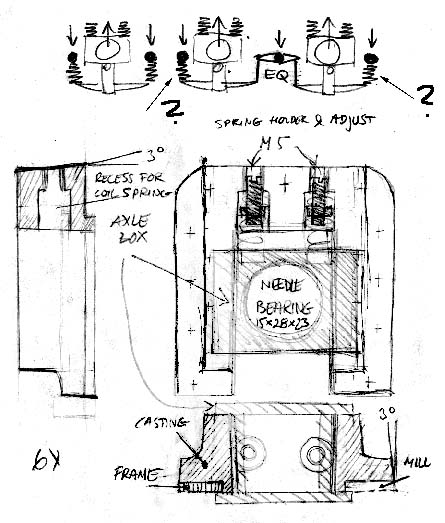
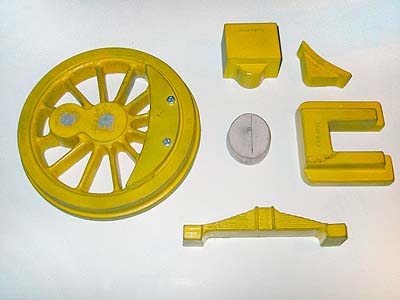
Above are the patterns for the wheels (with a removable large counterweight over a smaller one - this was not actually used when casting, though), horn blocks, axle boxes, brake shoes and at the left, for the dummy leaf spring rigging I intend to make. Using a swivel&tilt milling vise, it was pretty easy to make these shapes. For instance, the leaf spring pattern took no more than 2 hours to form from a rectangular block to the shape shown. (Actually, as a sculptor once said: you only need to remove everything that doesn't look like the scultpure... ;-)
Below are a couple of sketches I made before milling these patterns. Also, a sketch showing the intended equalization.
Preparing the molds
Close this window when you are ready...
Any information presented on this website (especially any do-it-yourself instructions) is given without any acceptance of liability for damage or injury - so, always remember: SAFETY FIRST!
The material on this page and its related pages is Copyright © 2001-2007 by J-E Nystrom. You may NOT copy, transmit and/or publish any of my images or texts in print, electronically, on your own website or in any other way. The author retains all rights to this work, with this sole exception: Storing the pages on your own computer or printing out a paper copy, for your own, strictly personal use is allowed.
You may, however, freely link to the "Building Live Steam Locomotives" page at: http://www.saunalahti.fi/animato/steam, or to my Animation Home Page at: http://www.saunalahti.fi/animato. You should NOT link directly to THIS page, since it's address may change in the future. Also, you may not put any of these pages or pictures into "frames" on your own website.
Thank you.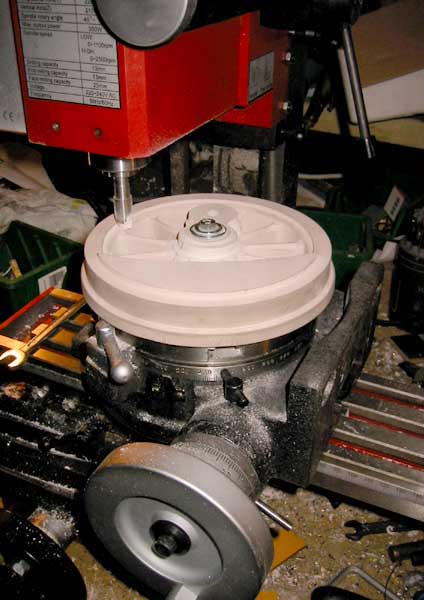
 The casting patterns mounted on a piece of melamine sufaced chipboard. All the parts - wheel, axle box, brake shoe, hornblock, and dummy leaf spring - will be cast in the same pour.
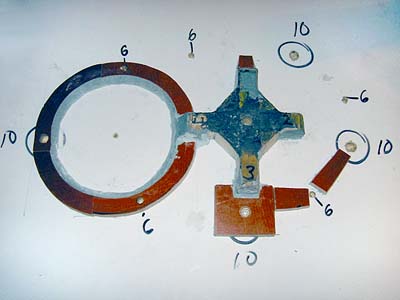 On the back side the channels from the pouring opening are formed. They don't need to be precise nor pretty... The marked holes will accept metal pegs which will form risers and vents in the sand molds.
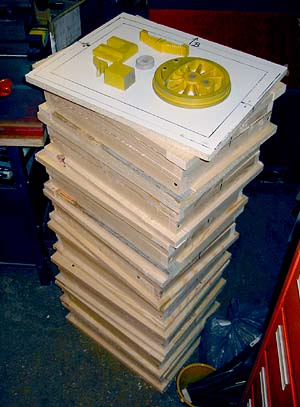 The cope and drag frames are simply made by screwing together pieces of 1x2" pine. The frames (8 pairs in all, i.e. 2 spares) are fitted together with pegs and holes in the wood. The same pegs also fit into holes in the pattern board, and thus ensure that the front and back parts of the mold coincide - not too critical in this case, since all the patterns are one-sided. (With split patterns, exact positioning of the halves becomes very important!)