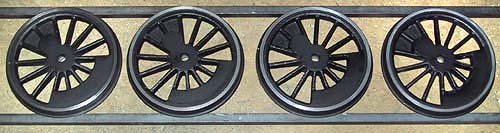
 Here are the four drivers, painted with primer so that I could stay relatively clean when handling them - curse that graphite in the cast iron! To get the wheels on the axles, I first had to carefully drill & ream the holes for the crankpins in exactly the right position and attach the pins (tight interference fit).
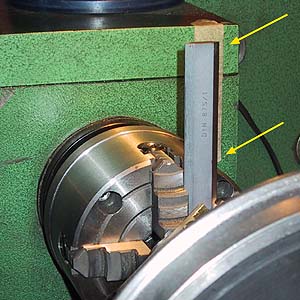 Then, I used the 4-jaw chuck's 90 degree division as a guide for the quartering: I centered one end of the axle in the 4-jaw (the other end already had the wheel attached), and using a precision ground square placed on one of the jaws, I put a masking tape marker on the lathe's headstock. By putting the square on the next jaw, and sighting at the tape edge along the square (see arrows) I could turn the chuck exactly 90 degrees (visual tolerance plus minus a fifth of a degree, perhaps?).
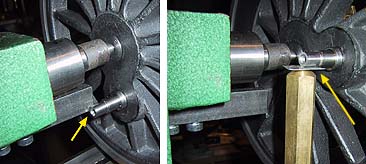 I had already added a stopper for the crankpin to the underside of the lathe's tailstock (see arrow in left image, shot from behind the lathe). After turning the wheel 90 degrees as described above, I chose suitable pieces of scrap to build another stopper that simply rested on the lathe bed. Adding a shim on top of that (arrow) made the square's edge again coincide precisely with the masking tape edge. Now I was ready for the actual quartering!
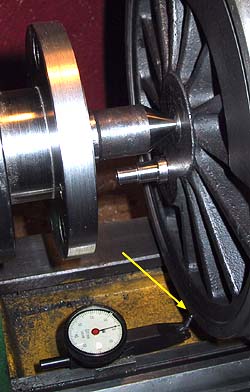 Before setting the angle, I of course ensured that the wheel was turning true on the axle - using a dial readout, I could ascertain that the wheel wiggled less than 0.04 mm (less than 2 thou) at the rim, see arrow.
Since I used Loctite 601 to secure the wheels, and there had to be a loose fit in order to leave a small space for the Loctite, I had turned the axle 0.05 mm (2 thou) undersize and then indented it with a center punch in a tight pattern:

This kept the wheel on firmly enough when doing the setup, but enabled me to move its position ever so slightly (with a small rubber mallet) to get it to run really true.
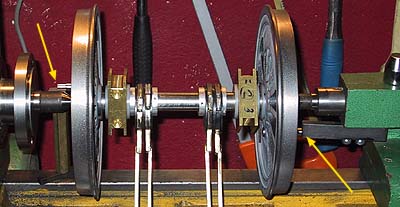 When the second wheel ran true, I positioned both crankpins firmly against their respective stoppers - see arrows. And yes, I had indeed remembered to include all the stuff that was supposed to be on the axle - nylon washers, axleboxes, eccentrics etc. Forgetting them would have resulted in quite a hassle, having to open up everything again...
Finally, when the Loctite had set, I drilled and tapped for an M3 grub screw in the crack between each wheel and axle to ensure that the wheels will not slip on the axles even under high stress.
The Baldwin 3003 Project so far, 2001-06-28 :
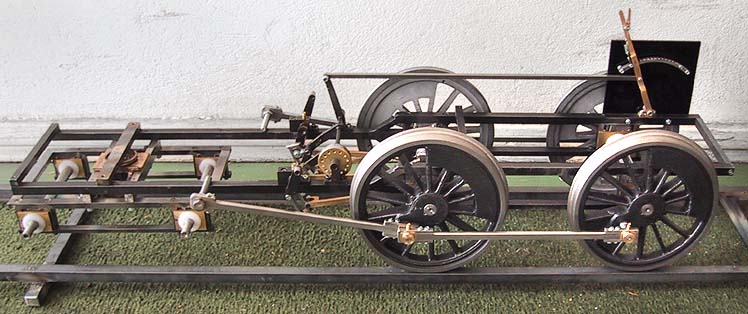
Working to tight tolerances, using micrometer, dial readout and digital calipers really paid off - everything was silky smooth; no binding, no tight spots when I inserted the axleboxes in the frame and added the coupling rods (which I had made earlier, contrary to accepted practice - some say the rods should be bored using a jig made with the help of crankpins already in place on the wheels). In fact, giving one wheel a quick impulse with the hand, the whole contraption was freewheeling for several revolutions! I feel that the often-published fear about quartering wheels and making the coupling rods is a bit exaggerated (at least on a 4-4-0) - careful work and frequent use of measuring devices will avoid most problems...