Well, here's my suggestion, cheap and easy:
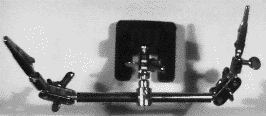
Go to an electronics store, or a hardware store selling hobbyist tools, and buy a few of the small gadgets sometimes called "miniature vise grips" or "helping hands". They are used when soldering electronic components together - a real necessity, I've burned my fingers more than once on hot resistors!

... and they cost just a few dollars - this one was under $ 15.00 here in Finland! That's $ 5.00 per ball joint - hardly any idea to make them yourself or have them machined for you at this price!
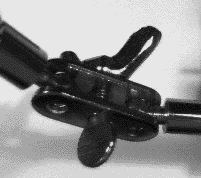
Here's a closer look (the whole joint is less than one inch long):

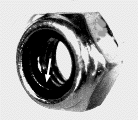
Don't worry about the bulky wing nut & screw - just remove them and substitute a suitable machine screw with a locking nut, i.e. a nut that has a plastic insert which grips the bolt so that the nut won't unscrew even when you're flexing the joint. Also, this bolt & locking nut helps you set the right tension of the ball joint.
If you (and/or the hardware store clerk... ;-) are unfamiliar with locking nuts, here's one:

The arrow shows the plastic locking insert.
Hope this helps all you aspiring Puppet & Clay Animators out there! Please note that these ball joints certainly aren't of the professional quality that is used by major clay animation producers, but they're quick and easy for low budget & amateur productions.
There are many other ways of making joints, of course. This chicken character that I animated for a few commercials has an armature of thick aluminum foil in the wings, soft iron wire in the comb on top of the head and in the wattle under the beak. For more info about this, see the "Clay Chicken" Page).