Back in the 1910's, while making "Gertie the Dinosaur", Winsor McCay used small inked crosses in the corners of his drawings to position the papers correctly. This is a tedious and rather inaccurate way.
The best registration method, and the only one used professionally nowadays, is the "peg bar":

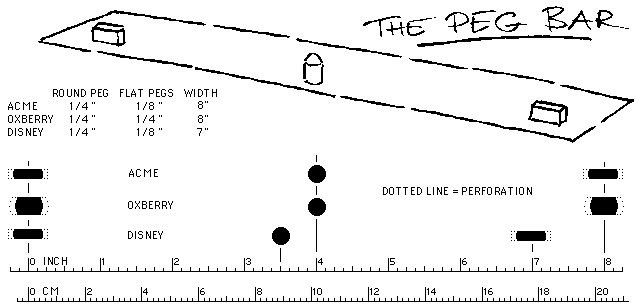
As shown, there are several different types of peg bars, the "Acme" type being the most common. The "Disney" type was used for a time at the Disney studio, byt they have converted to Acme, too.
These peg bars all have one central, round peg and two oblong pegs on each side. Earlier, well into the 1940's, only two round pegs were often used even by the major studios. But the oblong pegs, and the corresponding perforations that are a bit wider than the pegs, ensure that there is no wrinkling or tearing even if there is a slight shrinkage (or stretching) of the paper or cel.
A peg bar is usually made of metal, but less expensive, plastic "student" bars are also available from animation supply houses. The peg bar enables the animator to keep a whole bunch of drawings in perfect register, and since a pegbar is also used on the scanner or camera, the positioning will always be correct even in later phases of the production.
In addition to peg bars, a paper / cel punch is also needed. This is a heavy duty perforator, that can accurately punch the 3 holes in a stack of up to 10 sheets of paper or 5 cels.
DO-IT-YOURSELF IDEA 1:
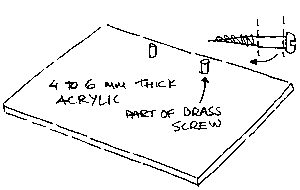
In lieu of a peg bar and an expensive professional punch, you can use an ordinary office perforator, and construct your own "peg plate" from a sheet of milky white acrylic plastic (check your Yellow Pages for suppliers of plastics, they'll cut it to size for you) :

The pegs are cut from brass rod (or, if unavailable, two brass screws having the same shaft diameter as the punch holes), using a hacksaw. The peg tops are filed round. In order to get the two pegs accurately positioned, there is a little trick: Punch holes into a thickish piece of cardboard with your perforator. Use this cardborad to mark the centers of the holes that you will drill in the acrylic. Drill ONE of the holes to the exact size, but the OTHER hole a bit larger. Then, using the perforated cardboard as a "positioner", thread the pegs through the holes, and use "5-minute epoxy" glue to attach them to the acrylic, keeping the cardboard in place, pressed tightly against the acrylic while the glue sets. In addition to fastening the pegs, the epoxy glue will also fill the larger hole, and the cardboard "positioner" will ensure that the distance between the pegs will be EXACTLY what your perforator requires. Simple but effective!
DO-IT-YOURSELF IDEA 2:
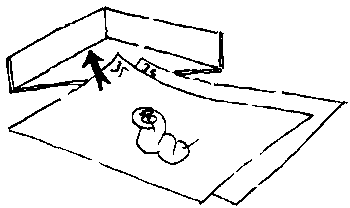
Another, even simpler possibility is to construct a "corner" of cardboard, into which the paper edge is pushed. This also enables you to position several sheets on top of each other:

THE ANIMATION DISK

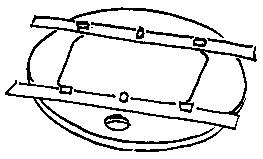
The disk enables you to get a more comfortable position when drawing slanted lines, and since a disk usually also has one or two sliding pegbars, it is easy to plan and execute panning movements (such as walking or running) by using the ruler-like graduations on the sliding pegbar.
The disk is not absolutely necessary - I've animated many scenes "on the road" using a peg plate as described above.
Here is the ideal ANIMATOR'S DESK:

I bought a 60 x 80 cm (24 x 32") adjustable drafting table with a built in light box, removed the ruling mechanism (which I can reattach whenever I need to do technical drawings), and made a plywood table top with a suitable hole for the animation disk. (I use a purchased, metal disk, but you can make one yourself, see link above...)
This setup allows me to adjust the height and tilt of the desktop to the most comfortable position. The complete drafting table did cost a little over $ 600, but it is definitely worth it.
Naturally, an animator's desk can be made in many ways. You can build one yourself, or you can build just a light box (with a tilted top surface with a suitable hole for the disk), or even use just a rectangular piece of opal (milk-colored) acrylic with taped-on pegs, or the peg-plate described above, stacked up on a few thick books, with a fluorescent light beneath it (don't use an ordinary incandescent light bulb - it will soon get too hot!).
The important thing is to get a comfortable working position.