 This is a really, really simple stand for shooting animation. You cannot do anything fancy with it, but if you are interested in making your own animated films, you must have something to attach your camera and lights to... I built this just to shoot pencil tests on, with my ANIMAC software. For more elaborate stands, see the history of stands.
The base for the stand is made of melamine-covered fiberboard, or any other suitable wooden board. The stand itself is made from square iron tubing, available at many hardware stores. Some welding is necessary, but you should probably be able to get help from an auto (or bicycle) repair shop that has the necessary welding equipment.
The dimensions are not critical, and depend on your preferred artwork size. The lights are ordinary household clip-on armatures, max 60 Watt bulbs. Two of these give enough illumination at this short distance. Use Photo Enlarger Bulbs, since they have a better color temperature than ordinary bulbs, which are reddish. (If you shoot on negative film, you can use ordinary lamps. The lab will correct for the small error in color temperature.)
Here are a few drawings to show you how to construct the stand:
NOTE: The arrows in all these drawings show where the weld joins are.
 The "columns" are made of square pipe, approx. 20mm wide. The camera carriage is made of similar tube, except for the two "sleeves" that fit snugly on the columns - they are the next larger size tubing. The sleeves have tightening screws attached (A hole is first drilled in each sleeve, and a nut is welded over the hole. This allows height adjustment.)
 The camera attaches to a flat piece of iron sheet, 1.5-3mm thick, which is welded to the camera carriage. It has a suitable hole for the 1/4" tripod screw used for securing the camera.
 The columns are attached to square pieces of iron sheet, also 1.5-3mm thick, which are drilled and attached to the base with screws.
These drawings should give you an idea on how to construct the stand. The main thing is to have it sturdy enough, so that it does not vibrate when you shoot your animation.
 Regarding lighting:
You should use at least two lamps, at a distance of at least twice the width of your drawing, and at a 45 degree angle, as seen in the last of these drawings.
Four lamps are even better, and should be placed in the corners, to give very even illumination. If you want to use four lamps, you might want to redesign the camera carriage so that you have suitable attachments for the lights on the carriage itself...
The light bulbs should absolutely be matted (frosted), NOT clear! The reflectors (armatures) are not critical if you use matted lamps, the cheapest ones you find will do. Make certain. however, that they are rated to accept the wattage bulbs you're going to use, or you might otherwise start a fire!
If you shoot cel animation, you need a piece of plate glass (preferrably made in the "Floating" process, which gives almost optical quality glass inexpensively), to which you can attach suitable handles with epoxy glue. This glass insures that your cels lay flat against the background, to eliminate shadows.
Ensure that no reflections will be shot on film! A good idea is to place a reflection guard, i.e. a piece of black cardbord in front of the camera, with a hole cut for the lens. This ensures that the camera won't be seen as a reflection in the cels! The cardboard should be twice the size of the image area. There is a kind of velvety, flocked paper that reflects very little light. It can be glued to a piece of thicker cardboard, and makes an excellent reflection guard.
HISTORY OF ANI-MATO CAMERA STANDS
Here are a few of the animation stands I have constructed over the years, the first ones when I was still an animation hobbyist:
| This was my VERY first stand (1967 - gosh, some 40 years ago!!!) As you can see, it is extremely simple, basically just a holder for the double-8 mm camera and the lamps, no movements at all. I didn't use this for long... | 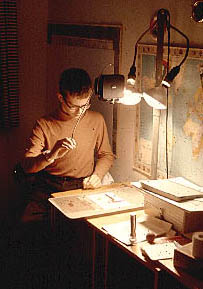 |
| This one (1968) is a little more complicated than the one above. It has a mechanism for moving the camera and a panning pegbar & tilting tabletop. (It doesn't actually tilt, but that's what the N-S movement is called...) The camera is a 16mm 50-ft cartridge loading Revere model. You can see the simple multiplane attachment, i.e. a holder for two extra levels of glass. The lighting is still very simple... | 
|
| Here is the first "proper" Multiplane stand, with simple electric drive of pegs & camera in the box beside it (1971). If you look closely, you can see that I used the same column assembly as in the previous stand, but on a riser platform. You can also recognize a 16mm Bolex on top of the stand. It is attached to a revolving holder, and is actually in the wrong position in this image - just to show the "photogenic" side of the Bolex... The right-angle finder attached to the camera could be turned so that the viewfinder image could be seen in whatever position the camera was rotated. A short time after this picture was taken, I built a synchronous motor drive to run the camera. | 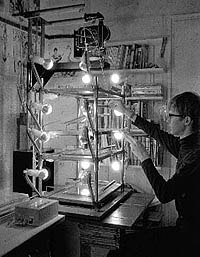 |
| Here are a couple of pictures of the electronics in this stand. Not too elaborate - mainly a relay system that moved each axle one turn for every frame. At this time I could make automatic pans and tilts only at one, rather slow, speed. If I wanted a faster move, I had to manually trigger the motors x number of times per frame... | 
|
| Later, I added a few more motors to the Bolex, one to drive the dissolving shutter, the other to focus the lens. These motors were also electronically controlled. | 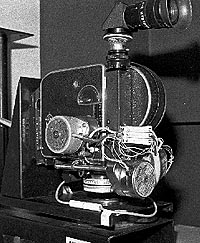
|
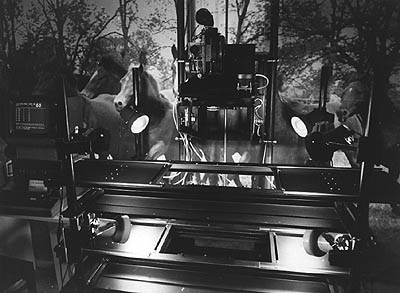
| This is a really versatile, electronically controlled 4-plane Multiplane, with my first 35mm camera (1974). This one was in use for several years, mainly for educational and industrial animation, and for a series of children's film for TV. | 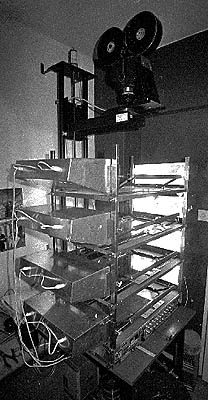
|
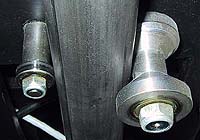
| This was the first stand of mine that I designed and built to use the "double cone roller" principle for the camera carriage. It is a very exact, low-friction bearing with virtually no play if designed properly. The weight of the camera carriage causes a lever force that presses the cone rollers toward the column:
The photo shows a double-cone roller from my current, computer-controlled stand (more about it below). The bearing on the opposite side is just for keeping the camera carriage in place when I remove the camera - otherwise the counterweight would tip over the carriage... | 
|
| The electronic control panel was very complicated, as you can see. Buttons, dials, switches of all kinds... | 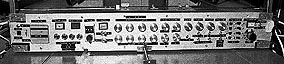
|
| Here's a picture of the electronics inside it - a real crow's nest... This is analog stuff, before the computer age! Every movement had an AC motor, which was controlled by a timing circuit. The longer the motor ran, the larger the movement per frame, and the faster the pan or tilt in the final film... | 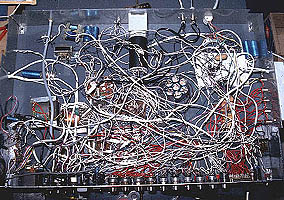
|

All these stands are scrapped by now...
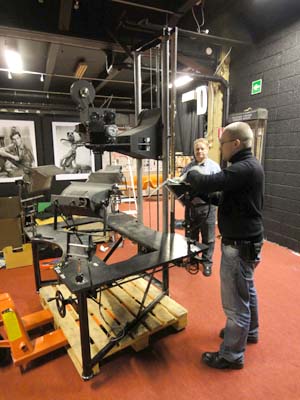
In 1982 I built a new, 3-plane, computerized motion-control stand with 15 movable axis, which I used until the end of the "film" era in 2010 - in May of that year, it was taken down and deposited at the Finnish Museum of Moving images (www.kava.fi).
Both my stands were erected as permanent displays on Jan. 18, 2011:
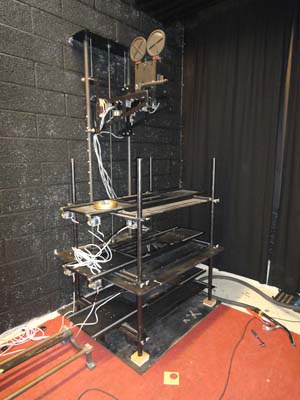
Here's the Multiplane in its original place - it was moved, three times, since, to new premises, whenever I enlarged my studio - at first, it was in my apartment's second bedroom, then, a small two-room studio... and so on! (Sorry about the messy background - it's a picture wallpaper, the stand is not set up in a meadow...)
The planes are pretty close together in this picture - the distance is adjustable. There is a 26 x 40 cm opening in each plane. The rest of the plane is opaque. This ensures there are no light leaks from one plane to another. Each plane has two moving pegbars (E-W), and each plane also "tilts" independently (N-S). All movements are by stepper motors - there are 15 of them alltogether, and over 100 bearings to make the movements exact and free from backlash. The lights are simple clip-on armatures. The secret is in the bulbs I use: Photo Enlarger bulbs! These are very heavily matted, and give a soft, ideal light, with the right color temperature. The elaborate light boxes used in the previous stand are not necessary when using these bulbs.
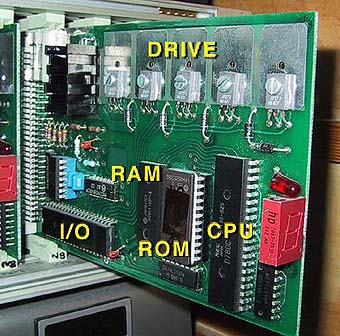
Each card (left) contains a microprocessor (CPU), memory and input/output circuitry, plus the power transistors needed for the stepper motor drive. Since each card has a 7-segment display, the rack can show messages up to 15 characters - it's nice to know what the computer is doing, since the monitor screen is usually filled with lists of numbers showing the position of all axles. The computer controlling all this is a vintage, 1979 Radio Shack TRS-80 Model I, with Level II basic.
As you can see in the drawing above, where every computer-controlled axis is marked with an asterisk (*), the versatility of this stand is enormous. Especially the rotating camera mount and the motorized focus, shutter and filter holder enable me to make quite amazing slit-scan and streaking effects.
Finally, in 1995 I acquired a second-hand West German, factory-made 35mm rostrum camera with aerial image back projection. I also aquired a 16mm camera of the same make, which I adpted for the Super-16mm format. (See the "ANIMATO equipment" page for a picture of the 35mm camera and the projector). I have also adapted my multiplane stand to accept the German camera bodies, and added stepper motor drives to drive them. Earlier, I used either the Arriflex or a Bolex on the multiplane.
Over the years, after becoming a professional, I've had to move my studio three times, to larger premises, in order to accomodate all the accumulating equipment! I figure I still have a few years of work for this film equipment, until everything goes completely digital...
Alas, that happened this summer (2010) - both my camera stands were dismantled, and my studio emptied. I donated all the equipment to the Finnish Moving Picture Museum, operating under the auspices of The Finnish National Audiovisual Archive.
Goodbye an era!
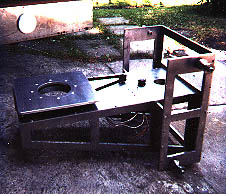 Here's the camera carriage during construction. The big bearing on which the camera rotates contains two V-formed grooves, formed on a lathe. These grooves are filled with small (4 mm) steel balls. This ensures no play in the bearing, as well as low friction. The camera is rotated via a toothed belt.
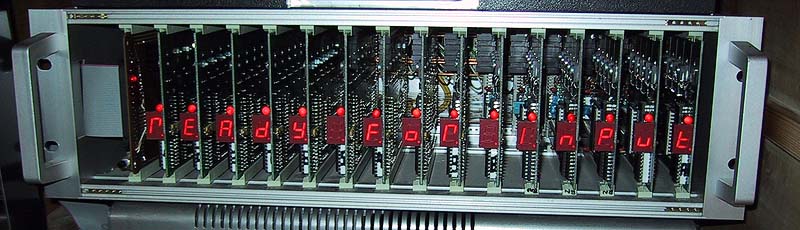
 Above is the control rack for the stepper motors. I built the electronics myself, with the help of a few friends, who assisted with the layout of the printed circuit boards, assembly language programming etc. The rack contains one interface card and 15 motor controller cards.
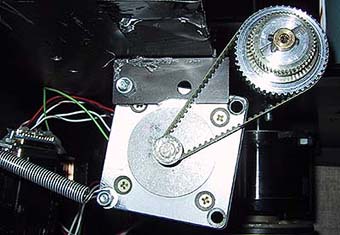 The 15 motors of the stand drive either the camera - here, the focusing motor is shown, with its belt tensioning spring, and the cogged adaptor that attached to the camera's focusing axle. Behind it, in the shadow, is a black, larger motor that is used for moving the entire camera platform up and down, i.e. zooming.
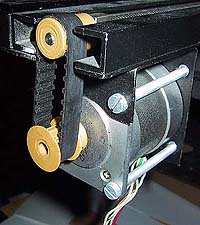 This is one of the six pegbar motors (see also drawing below). Using toothed belts, I had freedom of positioning the motor wherever most suitable - here, just under the corner of one of the three planes.
Sadly, such effects are seldom asked for anymore, since so many things can be done electronically on video these days. But the long panning movements together with the accuracy of the stepper motor drive system enables me to make very nice end title rolls. The glass sheets that can be attached to the moving pegbars can be over 150 cm (5 feet) long! In fact, as I'm writing this, the system is performing a 4200-frame end title shot, all by itself... On screen, that's almost 3 minutes!
Once, I even made a "Star Wars"-type main title by building a special rig for my stop-motion Arriflex, which I positioned looking at one plane obliquely from one side. The angle was quite small, and the wide-angle lens I used on the Arri made the titles grow to enormous size when they approached!