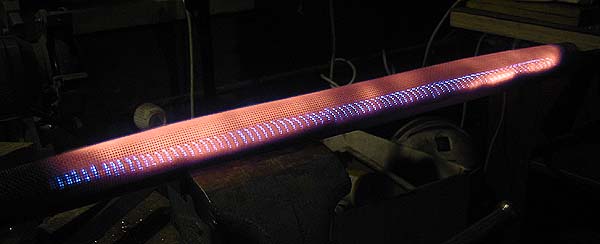
I already have obtained a boiler tube of 133 mm (5 1/2") outer diameter, and have experimented with a propane-fired "radiant poker burner" - basically a long tube with slots, and some stainless steel netting:
![]()
The tube, 500 mm long, has slots, 1 mm wide, spacing 5 mm. Inside the tube is a very fine-meshed stainless net, and outside, a few mm away from the slots, is a coarser net, also stainless.
When gas - air mixture is fed into this tube (which is plugged close at the other end), it escapes through the slots, where it is ignited. The inner, finer net prevents the flame flashing back into the tube. The burning gas heats the outer netting to incandescense. This radiant glow will be much more efficient than a blue flame heating the boiler directly.
The result of a first test was very promising: With approx. 400 grams of gas per hour, I got a heat production that far exceeded expectations! (In this test, I didn't yet pay much attention to the uniformity of the flame - that's why there is a "cold spot" about 1/3 from the right end.)
This type of burner will enable me to build a simple boiler without a firebox, instead using, for instance, 3 large flues containing radiant poker burners - this idea is based on a design by Susan Parker:
Hardening and tempering colors
Just for those who have asked for it, here's a quick picture of the colors to look for when heating iron to harden & temper it:
I shot a piece of bright iron heated from one end to show the tempering colors. My source (a book from 1943) give these temperatures for certain purposes:
230°C, light straw/yellow: Very hard cutting tools, engraving tools. Brittle.

260°C, dark yellow to brownish red: Lathe tools
270°C, reddish brown: drills, screwcutting taps
290°C, blue: springs, tools for stone and wood
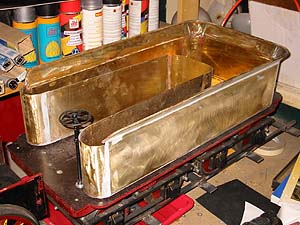
The tender is taking shape
Doing some metalwork with the bench cutter and simple metal brake I obtained over a year ago, I've constructed the tendet tank of 1.2 mm brass.
The entire tender is soldered, not riveted, so it is immediately water tight without any caulking,
The tender's beading is soldered on with a pencil torch, and all the solder joints are prettied up by using some filler, and subsequent sanding. There will not be a hand pump in the tender - the 3003 loco had a huge lever in the cab, on the left hand side, originally used for controlling the draft to the fire - so I'll use that handle for the pump. Painting is still ahead...
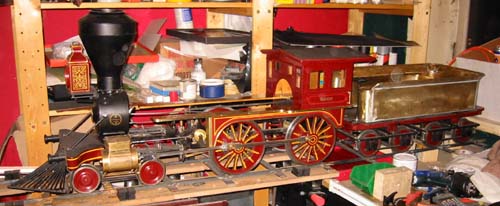
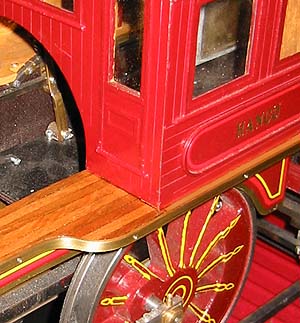
I have added a little touch of class to the loco by putting mahogany strips on the walking boards, and the loco's name "Hango" in gilded letter on the side of the cab:
New pages will foillow as the 3003 story continues...
Close this window when you are ready...
Any information presented on this website (especially any do-it-yourself instructions) is given without any acceptance of liability for damage or injury - so, always remember: SAFETY FIRST!
The material on this page and its related pages is Copyright © 2001-2007 by J-E Nystrom. You may NOT copy, transmit and/or publish any of my images or texts in print, electronically, on your own website or in any other way. The author retains all rights to this work, with this sole exception: Storing the pages on your own computer or printing out a paper copy, for your own, strictly personal use is allowed.
You may, however, freely link to the "Building Live Steam Locomotives" page at: http://www.saunalahti.fi/animato/steam, or to my Animation Home Page at: http://www.saunalahti.fi/animato. You should NOT link directly to THIS page, since it's address may change in the future. Also, you may not put any of these pages or pictures into "frames" on your own website.
Thank you.