Text & images Copyright © 1996-2012 by J-E Nyström. Copying or re-publishing without written permission is prohibited. You may only publish the web address for this site.
Text & images Copyright © 1996-2012 by J-E Nyström. Copying or re-publishing without written permission is prohibited. You may only publish the web address for this site.![]() Animators & Railroads...
Animators & Railroads...
THERE ARE SEVERAL SUBJECTS ON THIS HUGE PAGE AND ITS SUBPAGES: | |
| My old train sets | Walt Disney's & Ollie Johnston's garden railroads |
| Coffee Table layout in Z-scale (1:220) | Baldwin Steam Engines in Finland 1875-1950 |
| How I built the Z-scale layout | The Helsinki Model Railroad Club |
| Making street lights | Capacitor pulse drive for turnouts |
| Photographing a model railroad | Stamps with train motifs |
| Video clips of my Z-scale layout | Motorcycle Tin Toy |
| Model railroad scales/gauges | The Finnish Railway Museum |
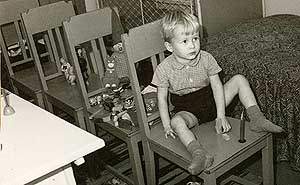
I've been a "railfan" all my life, even before I could talk properly - below I'm playing "ductor" on a train I assembled (with parental help, obviously) in the bedroom... Note the "joystick" type engineer's control handle (wooden dart with suction cup) - quite advanced for 1954!
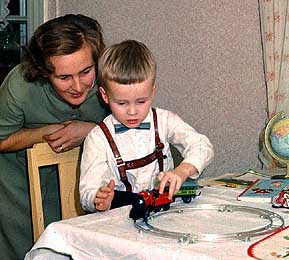
Model trains have always fascinated me; here is my very first, a Christmas present in 1956 when I was just 5 years old - the picture is scanned from an Ektachrome slide, the colors have survived quite well for 40+ years... unfortunately, the train did not!
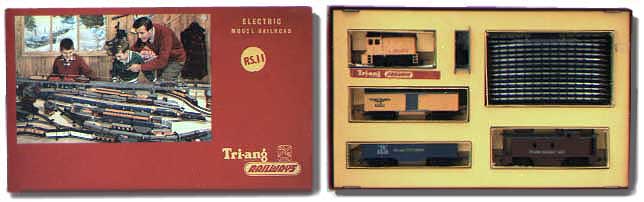
Later, in the early 1960s, I got a British "Tri-ang" train set, again as a present, long wished for:
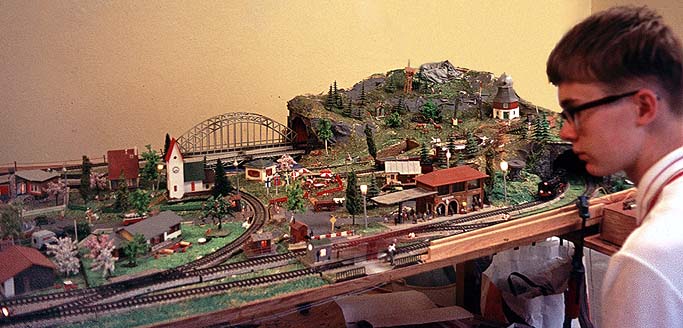
This little set (still intact in its original box) I enlarged over a short period of time with odds and ends of secondhand Italian "Rivarossi" stuff. Finally, I had a track going all around my room on a narrow shelf. I built some houses from plastic "Faller" kits and a few of my own design of painted cardboard. Of course, being an electronics tinkerer, I had to put lights in every house... A few plastic trees and accessories (bridges, a crossing etc.) completed the layout. After just a few years, I had to tear down the shelves when my other activities in the mid-60's (such as magic tricks, chemical experiments, photography and finally animation) required more space. A few of my friends did keep their layouts operational well into their teens and even 20's, until they too had to pack them down for storage. One had his layout on a large board that he could hoist to the ceiling of his bedroom with rope and blocks. Here is a Märklin layout that really shows what you can do in HO scale, if you have the space for it:
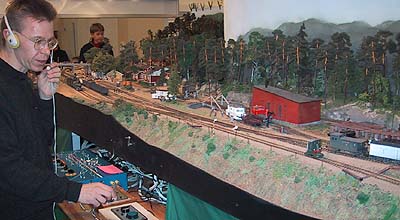
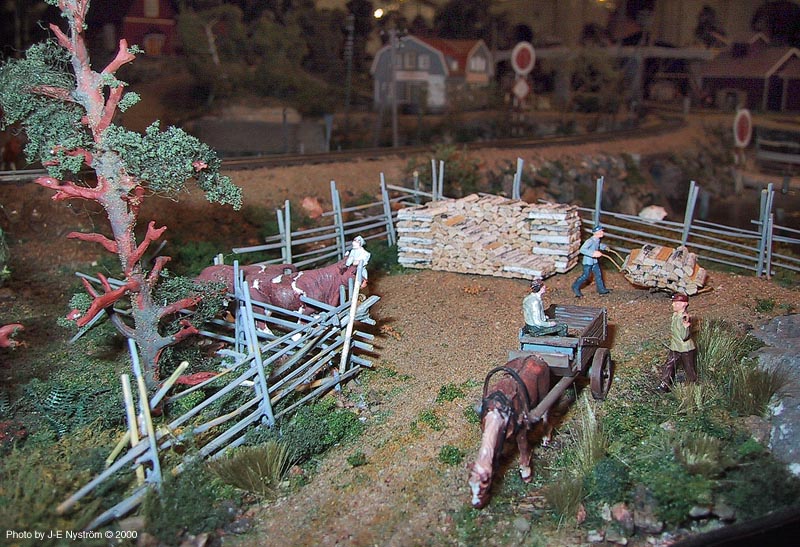
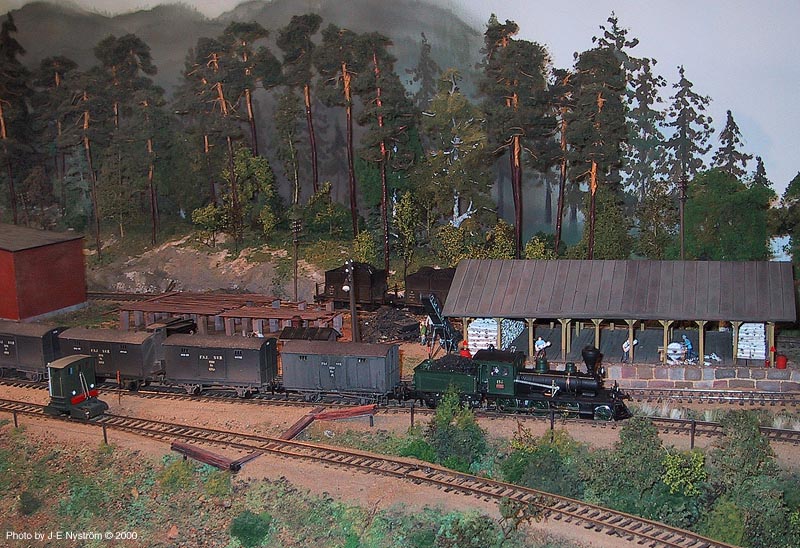
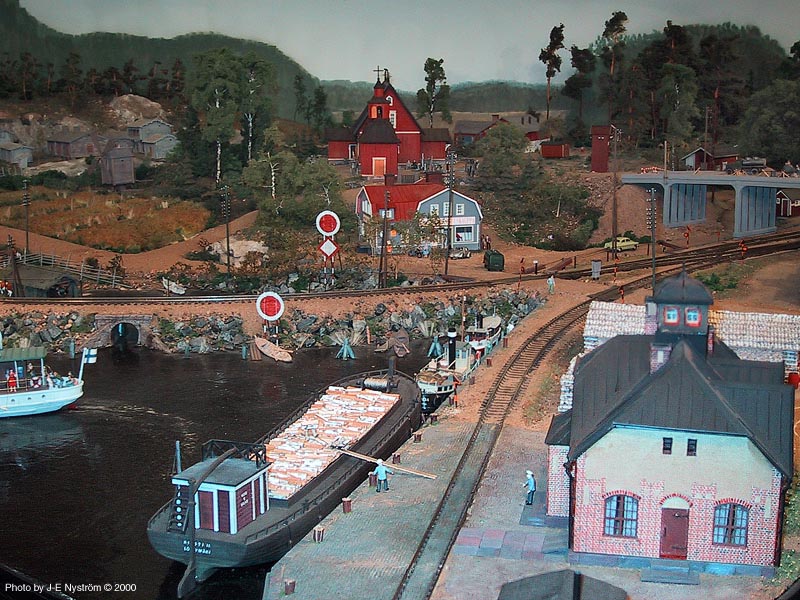
The Helsinki Model Railroad Club has a fantastically detailed layout, with accurately modeled Finnish engines & rolling stock, period buildings etc.
This picture is from a recent exhibition - for more detailed pictures that I shot at the same place with the tiny, but superb Canon IXUS / ELPH digital camera, click the small images below!
Close the new windows when you wish to return to this page.
 Click on thumbnails to enlarge! |
|
 |
 |
 |
 |
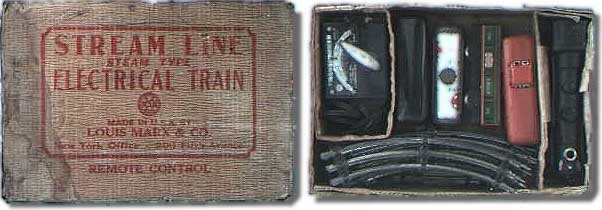
I have recently obtained an American tin toy train set, also with its original box, made by the Louis Marx company, N.Y., USA. It was produced in great numbers in the mid-1950's. If you have a similar set or any info about it, please do email me!

As you know, there are several different scales and gauges for model railroads. Here is a quick sketch of the more common ones:
Note that gauge and scale is NOT the same thing, for instance, OO and HO are different scales (1:76 and 1:87 respectively), but the same gauge, 16,5 mm, i.e. the distance between the two rails. This means that different scale trains can run on the same gauge track!
The I and O scales were among the ones first introduced, but HO ("Half O") is today the definitely most used scale all over the world (except for Britain, where OO is popular - see the "Tri-ang" above, which is actually labeled "OO/HO"). N scale is also becoming more common, thanks to its smaller size, and is provided by several manufacturers. Z scale, smallest of all, is produced only by one company, Märklin.
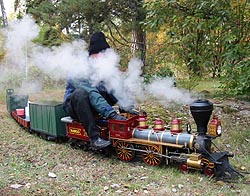
Among garden railroaders and "live steam" enthusiasts, the 3 1/2", 5", 7 1/4" and 7 1/2" gauges are the most common. The scales on these gauges vary, sometimes the rolling stock is modelled on narrow-gauge prototypes, which means the scale is larger than for "ordinary" gauge prototypes. Engines of the 5" (127 mm) gauge are usually 1:12 scale, and can often pull a train of half a dozen or more adult passengers - see below!
The track gauge also dictates the size of the entire layout, because you must be careful not to make the curves so tight that the rolling stock has difficulty following them. In a 7 1/4" gauge layout, the curve radius is usually around 10 meters (30 ft), while the tightest curves in Z-scale have a radius of only 145 mm (5 3/4"). Building Live Steam Locomotives in 1/8 scale
I am currently working on a 7 1/4" gauge miniature model (in scale 1:8, so it's LARGE!) of a 0-6-0 steam switcher locomotive. (My first live steam loco is shown at left.) Click here for the extensive pages about
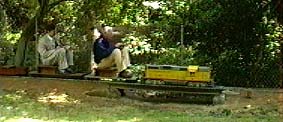
Isn't it strange how so many of the great animators working at the Disney Studio during animation's golden age were railroad hobbyists? Ward Kimball, Ollie Johnston, Carl Fallberg, to name just a few - oh, and let's not forget Walt Disney himself! Ward Kimball owned and restored several real-size steam engines, while Walt Disney had a backyard railroad in 7 1/4" gauge, 1:8 scale - enough to pull more than a dozen passengers!
Here we are riding on Ollie Johnston's 5" gauge, 1:12 scale backyard railroad:
There are many more pictures on a special page about
After choosing an animator's career and seeing so many other animators having railroading as a hobby, of course I too had to re-vitalize my old interest in model railroads and build a "proper" layout:
Nowadays, in apartment homes, there is seldom space for a very large model railroad. A layout with nice possibilities needs several concentric loops of tracks plus landscaping, hills, tunnels, bridges etc. A standard "HO"-scale layout of the functionality I wanted would have required four or five square meters of space - one third of the room! This time around, I scrapped the idea of a shelf around the walls - the railroad must be protected from dust, too.
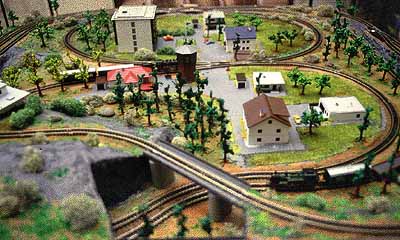
Keeping all this in mind, I chose Märklin "Z-scale", 1:220, the smallest commercially available scale, which is 2 1/2 times smaller than the more common 1:87 "HO". The entire model railroad is actually inside my living room coffee table... sized 85 by 85 cm (34 by 34"), and it's only 10 cm (4") high! You can see the acrylic edges which hold the plate glass cover (removed here) that protects the train from coffee spills... I know you can get coffee on many trains, but I don't want coffee ON my train! ;-)
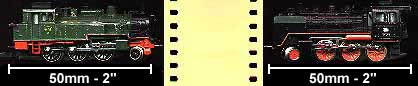
In "HO" the size of this layout would have been over 4.5 square meters (50 square feet)! To get an idea of how small Z-scale really is, compare these engines with the clip of 35 mm film:
If your computer display is around 72 dpi (i.e. a 14" screen at 640 x 480, or 17" at 800x600), then this picture shows the engines actual size! Each engine is just 50mm long, and weighs less than 30 grams (approx. 1 oz.)! Since the engines are so light, the track has to be kept meticulously clean - a little speck of dirt will stop the engine cold... Even though the engines are small, they're incredibly detailed - see this closeup of another locomotive I have - remember that the diameter of these wheels is only 6 mm (1/4"):
The drawing below shows the complete track layout. As you can see, I have economized and used a minimum amount of the rather expensive turnouts. There are 2 double-slip switches, one left, one right turnout and one crossing.
CLIP 1 (350 K)
CLIP 2 (280 K)
CLIP 3 (280 K) In the first clip, note how the two trains pass the same double-slip switch within seconds, just barely missing each other - the electronic control described below takes care of that! To learn how I shot these video clips (with a sugar-cube sized video camera), go to the "Mini video camera"-page.
This setup gives me a rather nice way to vary the trains' routes. I can park a train on the inner one of the tracks that run over the hills, or on the inner loop. I never bought an original transformer, but built all the electronics myself... (another hobby of mine :-)
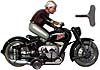 Since we are talking tin toys, here is a another one I recently aquired. It has a strange imprinting: "Made in US Zone Germany - D.P.A. Foreign Patents applied for". From this I can deduce that it must have been made pretty soon after WWII, in what later was called West Germany. This motorcycle toy (click to enlarge) has intriguing wind-up action: The rider stands beside the cycle, rises up on it, kick-starts, and then runs and steers the motorcycle in a circle. There are a couple of levers that change the action, and the rather realitic sound, too. Does anyone of you own a similar one, or have any idea of the value of this 200mm/8" toy, in almost perfect condition? If so, please email me!
my "LIVE STEAM" PROJECTS !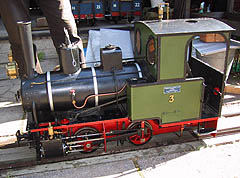 And, for a look at another Finnish rail hobbyist's garden railroad engines, click HERE!
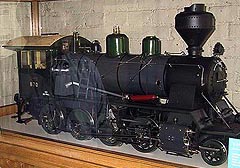 A friend of mine, Kusti Nyholm is starting to build a 7 1/4" gauge engine, a "Tk3" Finnish freight locomotive. Here's a scale model of the Tk3, displayed at the Finnish Railway Museum, in Hyvinge, less than an hour's drive north of Helsinki. At the museum, there are several restored old locomotives on display, click here for a page with a few pictures of them.
Walt Disney's and Ollie Johnston's backyard railroads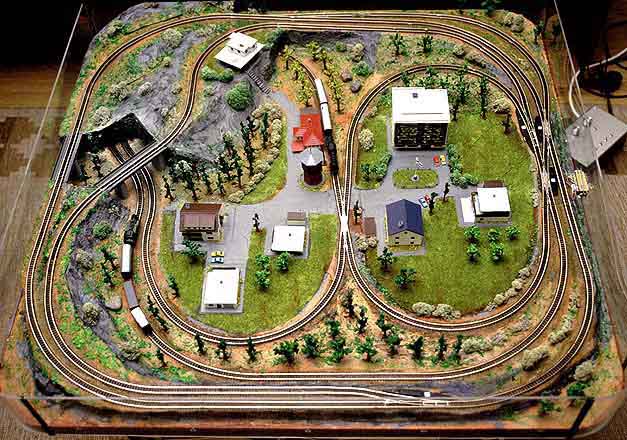

 A few video clips of my model railroad "in action":
shot from "A", 20 cm above tracks
shot from "B", track level
shot from "C", track level Turnouts are driven by a capacitor pulse that ensures sufficient energy for the short time needed to set the turnout. The connection diagram is for the two coils in one turnout. You need a DPDT switch for the connection. Capacitors are charged via 1 K resistors whenever a coil is in the "off" position. I drive the turnout coils with a considerable overvoltage - they are rated for 10 volts. However, since the pulse is very short, the coils cannot overheat (the "resting" current of 15 milliamps through the charging resistor does not generate any appreciable heat and is thus small enough to be ignored). The capacitor is charged and ready for action within 2-3 seconds after a previous switching. This system insures effective and rapid switching of the turnout, and can be applied to other DC operated systems, too. (WARNING: It won't work on AC operated layouts - an electrolytic capacitor may explode if connected to AC!)
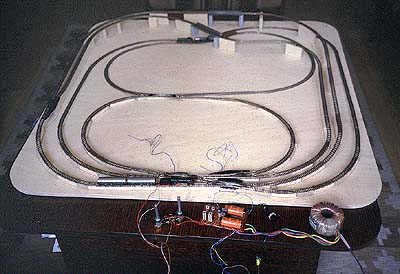
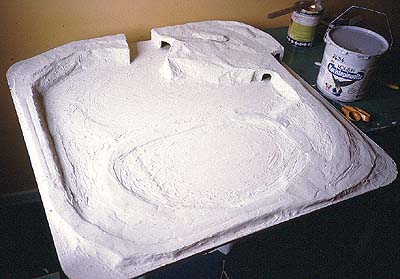
| First, I cut a piece of plywood to fit precisely over the table. On this, I planned the tracks & bridges. Plywood pieces cut to suitable height provide the grades, and support for the track. In this picture, the track is laid out for the first test run, to make sure the grades were not too steep for the tiny engines. Electrically, this layout is run on "separate half-wave pulse modulated DC", which means I can run two engines (each equipped with a diode inside) independently, provided they run in different directions. You can see the electronics on a small circuit board left of the toroidal transformer. All this was later packaged into a nice box with suitable control buttons, as seen in the right upper corner of the large image of the whole layout earlier on this page. |
| Covering the plywood supports with cardboard and thick aluminum foil gave me a good base for the landscape. Note that there are two small "hills" on top of the large hill - these are covers for openings that enable me to rescue a train that might have derailed in the tunnels! I covered the foil with a latex-based filler, to make it more rigid. This completed the shaping of the layout, everything after this will be the "dressing on the cake"... |
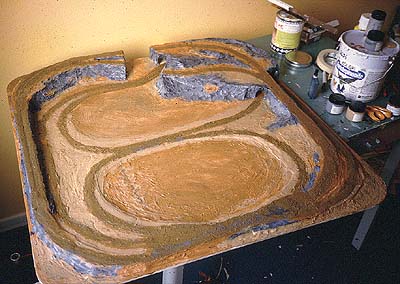
| Painting with acrylics (animation cel paint, actually!) mixed with a little sawdust gave me the right texture. It is important that the painted surfaces look a bit rough - there are no enamel-smooth cliffs in nature! |
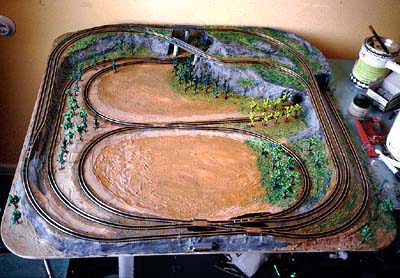
| For landscaping, more sawdust, natural stones and lichen which I colored in a mixture of water color and glycerine.
|

| It's finally taking shape! Grass is simulated by green velvet flocked paper. Some plastic house kits in scale 1:220 to give a "habitated" look. This layout was really fun to design and build! Took me something between one and two hundred hours of work, spread out over a longer period, of course... There are a few "Hall-element" magnetic transducers under the track, and small magnets under each train's first car that makes the layout automatic: The lights go red, one train stops at the station, until the other clears the 3-turnout area - then the light goes green and the first train can continue. |
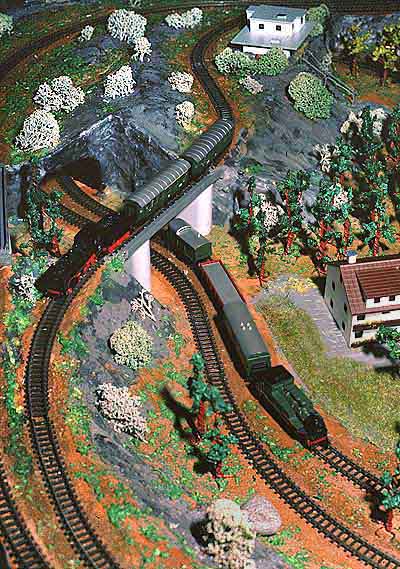
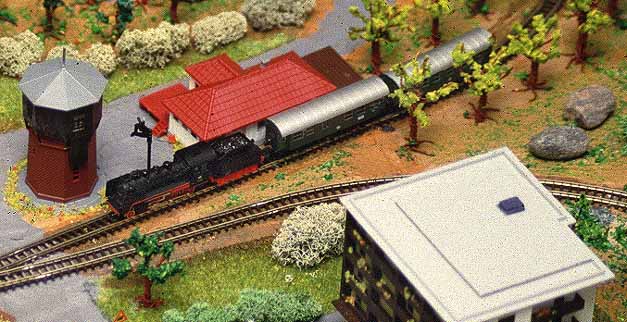
It is interesting and challenging to photograph any miniature model - you have to know your camera equipment well, and be familiar with the pitfalls of depth of field, camera shake, etc. I've spent many hours looking for interesting camera angles, choosing the right lens & lighting when photographing my layout. To get an idea of the small size of the trains in the close-up pictures below (if you've never seen a Z-scale layout before), remember that the gauge (distance between the two rails in a track) is only 6.5 millimeters (1/4"):
I've also used my panoramic camera to shoot the layout, a couple of examples below. However, this special camera lacks any focusing mechanism (hard to construct on a revolving-lens camera), so I had to use a close-up diopter lens, which doesn't give the best possible results - because of the rotating optics and the distortion introduced by the diopter, there is a slight horizontal smear even on those parts of the image that ought to be in perfect focus. Also, the depth of field isn't too great, even though I stopped down the lens to f:11. The perspective is interesting though: I placed the camera inside the layout, on the "ground", and both pictures show a 120° view. (If your monitor is not wide enough, you'll have to scroll sideways to see the whole panoramas...)
I have also shot 3-dimensional pictures of the layout, one example can be found on my 3-D page.
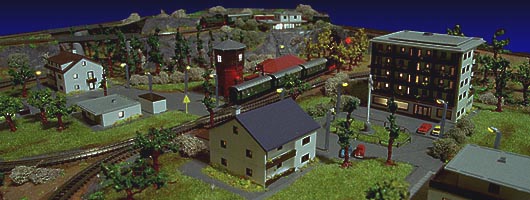
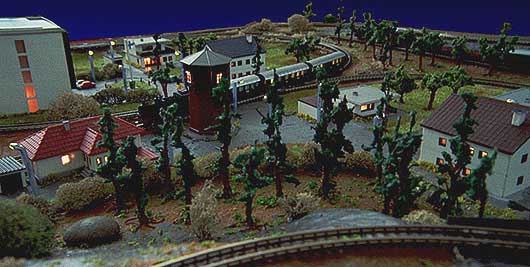
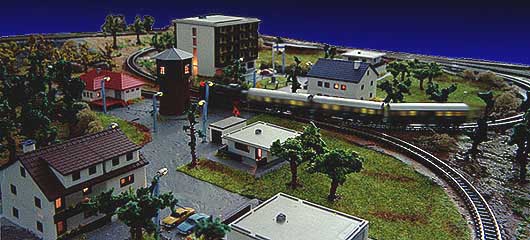
Here are a few "night" shots of the layout, showing the lighting in the houses and the street lights:
The pictures were scanned (with a Minolta Dimage Dual scanner) from negatives taken in very weak light with a Minolta Vectis S-1 APS camera loaded with 200 ASA print film. I added the sky and corrected the colors on my Mac - the pictures originally had a very strong orange hue, due to the overhead artificial light which I dimmed to barely a glow. Exposure time was 30 seconds on f 8, zoom set at 22 mm.
The lighting inside the houses is simple: I used ordinary flashlight bulbs (a few each in series), and some transparent paper in the windows for diffusion.
 I prefer to use 35mm 100 ASA slide film, mostly using a macro-focusing 24-48mm wide angle zoom lens (wide angle lenses give better perspective and greater depth of field). The best lighting is natural window light or electronic flash ("bounced" via ceiling or wall) to avoid harsh shadows - sometimes using a large white cardboard as a reflector to lighten up the shadow side. The f-stop must be as small as practically possible to get enough depth of field, so this means long exposure times with the camera on a tripod. The original slides are of course much sharper than you can see here, since I've had to compress the pictures quite heavily when scanning & putting them on the web server (otherwise you'd fallen asleep waiting for the pictures to load). The image immediately above is in fact a enlargement of only a part of a slide which contains almost the whole layout - see small image at right. You can actually see the film grain in the smooth area of the white roof top!
I have a large picture file (250 K, 600x800, high quality JPG) on a separate page, a miniature on the right. It shows the entire layout from an angle not seen on this page, so if you don't mind the little wait, click to enlarge!
I prefer to use 35mm 100 ASA slide film, mostly using a macro-focusing 24-48mm wide angle zoom lens (wide angle lenses give better perspective and greater depth of field). The best lighting is natural window light or electronic flash ("bounced" via ceiling or wall) to avoid harsh shadows - sometimes using a large white cardboard as a reflector to lighten up the shadow side. The f-stop must be as small as practically possible to get enough depth of field, so this means long exposure times with the camera on a tripod. The original slides are of course much sharper than you can see here, since I've had to compress the pictures quite heavily when scanning & putting them on the web server (otherwise you'd fallen asleep waiting for the pictures to load). The image immediately above is in fact a enlargement of only a part of a slide which contains almost the whole layout - see small image at right. You can actually see the film grain in the smooth area of the white roof top!
I have a large picture file (250 K, 600x800, high quality JPG) on a separate page, a miniature on the right. It shows the entire layout from an angle not seen on this page, so if you don't mind the little wait, click to enlarge!


(Note: You could add a rectifier diode in series to protect the LEDs against reverse current if you use higher than 6 Volt AC to power the LEDs. This is just a good precaution.) Connecting several LED's in series, you must calculate a 1.5 Volt drop over each led, and multiply. Say you have 5 LEDs. Then 5 x 1.5 = 7.5 Volts. If you feed them on 12 V, there is thus a 4.5 V "surplus" voltage. Without a series resistor, this would cause a burnout of the LEDs, because the current would not be restricted. To find out what value of resistor to use, you need Ohms Law: R=U/I where R is the (yet unknown) resistor value, U is the already calculated voltage "surplus", and I the current in Amperes (10 milliamperes equals 0.01 Amperes). Then, for the 5-LED example above: R = 4,5 divided by 0.01, i.e. R = 450 Ohms. So, for five LEDs in series on 12 Volts, you need a series resistor of around 450 Ohms. The closest stock value is 470 Ohms. The wattage can be very low (it's only 10 milliamps!) Thats it! For just two leds on 12 V, the "surplus" is 9 V, and then, the resistor should be around 900 Ohms. You can use the formula for any number of LEDS. IMPORTANT: You must always leave a surplus voltage of a few volts for a series resistor! Depending on color and type, LEDs need at least 1.5 V, but may need more. So, putting 10 LEDs in series on 12 Volts won't work! (NOTE: If you run on AC and use a rectifier diode, that diode needs about 0.7 Volt, just as the LEDs needed 1.5 V. Just being technical here...) Note that LEDs are "polarized", and will light only in one direction on DC current. You must connect them all the same way - otherwise you can't get them to light up at all! Usually the LEDs have a slight cutout on the base, which should be pointed to the minus side of the supply. If it doesn't work, try the other way around...
|
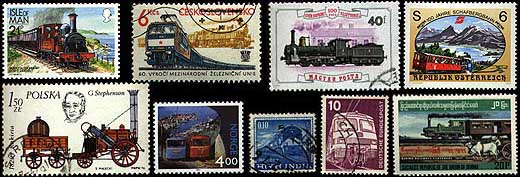
Did you know that there are hundreds, perhaps thousands, of different stamps with railroad motifs? I found some, sold by the bagful, at a local stamp dealer, at a very nice price. Stamps are small works of art - I spent a whole evening with a loupe, looking at the ones I bought! Here are just a few examples from different countries: Isle of Man (British Commonwealth), former Chechoslovakia, Hungary, Austria, Poland, Norway, India, Germany and Burma.
And, last but not least, here is a page for fans of "real size" engines:
American Baldwin Steam Engines used in Finland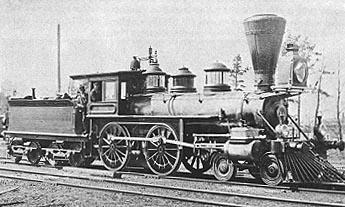
 I made trees by twisting together thin, soft copper wire for roots, trunks and branches, painted them brown, and then glued colored sawdust to the branches as foliage. There are almost one hundred tiny, hand-made trees on this layout. They really look much better than the molded plastic trees you can buy, and are a lot cheaper and really fun to do.